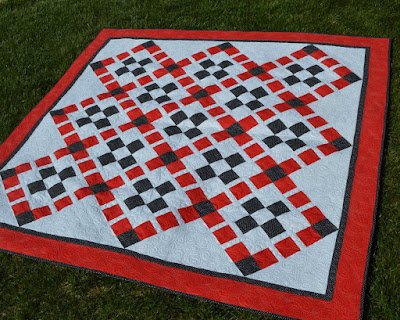
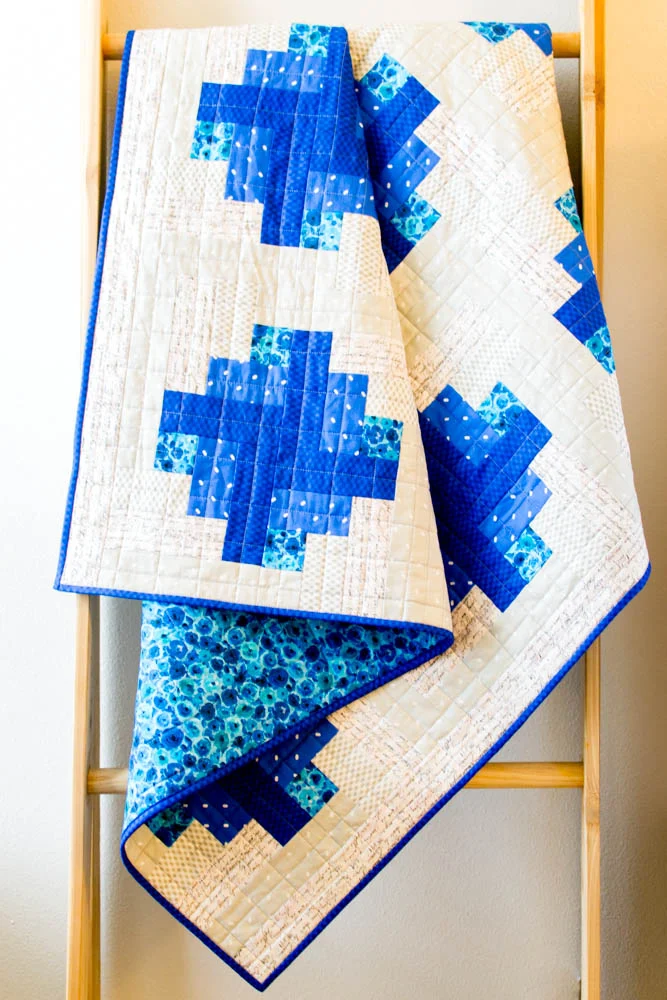
When I first stumbled upon the world of quilting, I was instantly enchanted by the endless possibilities of colors, patterns, and textures. One memorable project that stands out in my journey is the Kings Crossing quilt. It wasn’t just about piecing fabric together; it was about creating a dance of interlocking geometric designs that bring joy and movement to the eye. My adventure with Kings Crossing began when the lovely folks at Ink and Arrow Fabrics invited me to craft a quilt using their delightful Pixies Dot fabrics. The result was a symphony of dots and lines that I am thrilled to share with you today.
Kings Crossing: A Geometric Delight
The Kings Crossing quilt is a testament to the beauty of strip piecing and geometric design. With its interlocking blocks and vibrant Pixies Dot fabrics, this quilt isn’t just a cozy blanket—it’s a work of art that showcases the harmony of color and structure. The quilt’s name, Kings Crossing, evokes the elegance and strength of intersecting paths, much like the strategic game of chess. This project not only allowed me to explore new design possibilities but also gave me the joy of seeing it displayed at the Ink and Arrow Fabrics booth at Market, and eventually donating it to my alma mater.
The Art of Strip Piecing
One of the joys of making the Kings Crossing quilt was the efficiency and creativity brought by strip piecing. This technique, which involves sewing long fabric strips together and then sub-cutting them into smaller units, not only saves time but also ensures precision and consistency in the blocks. The repetitive yet soothing process of strip piecing was a key part of what made this project both enjoyable and fulfilling.

Full Pattern: Click Here
Materials
To make your own 72″ x 72″ Kings Crossing Quilt, you will need:
- 3 yards of Pixies Dots White
- 2 yards of Pixies Dots Red
- 1 3/4 yards of Pixies Dots Black
- 5 yards of Pixies Dots Charcoal for Backing
Got all your fabrics? Let’s get started!
Getting Ready: Tips for a Smooth Start
Before diving into the cutting and piecing, take a moment to prepare your fabric. Press all your yardage thoroughly to remove any wrinkles. This step is crucial for ensuring accurate cuts and seams. Gather all your tools—rotary cutter, cutting mat, rulers, and sewing machine—and set up your workspace for an efficient and enjoyable quilting session. Remember, a well-prepared quilter is a happy quilter!
Step-by-Step Instructions
Cutting the Fabric
- Red Pixies Dot Yardage:
- Cut (7) 4 1/2″ x 42″ strips, trimming the selvage.
- Cut (9) 3 1/2″ strips from the Width of Fabric (WOF).
- Black Pixies Dot Yardage:
- Cut (4) 3 1/2″ strips from WOF.
- Cut (8) 2 1/2″ x 42″ strips, trimming the selvage.
- Cut (7) 1 1/2″ x 42″ strips, trimming the selvage.
- Cut (28) 3 1/2″ x 3 1/2″ squares.
- White Pixies Dot Yardage:
- Cut (2) 21 1/2″ x 21 1/2″ squares. Sub-cut these in half diagonally twice to make 8 large setting triangles.
- Cut (2) 13″ x 13″ squares. Sub-cut these in half diagonally once to make 4 small corner setting triangles.
- Cut (5) 3 1/2″ strips from WOF.
- Cut (6) 1 1/2″ strips from WOF.
- Cut (5) 3 1/2″ x 3 1/2″ squares.
- Cut (26) 1 1/2″ x 11 1/2″ rectangles.
- Cut (26) 1 1/2″ x 9 1/2″ rectangles.
Strip Piecing
- Red and White Strips:
- Sew a 1 1/2″ white strip to a 3 1/2″ red strip. Chain stitch 6 of these sets.
- Sew these 6 strip sets together in pairs to create 3 larger strip sets.
- Add a remaining 3 1/2″ red strip to each set to create a strip set with three red strips and two white strips.
- Black and White Strips:
- Sew a 3 1/2″ black strip to a 3 1/2″ white strip. Chain stitch 3 of these sets.
- Add a white strip to each pieced black strip, then add another black strip to one of these pieced units to create one full strip set.
- Sub-cutting:
- Sub-cut the red/white strips into 3 1/2″ x 11 1/2″ units.
- Sub-cut the black/white strips into 3 1/2″ x 9 1/2″ units.
- Piece additional units from 3 1/2″ white and black squares to complete the needed strip set units.
Making the Blocks
- Nine Patch Blocks:
- Combine white/black/white strip units with black/white/black strip units, sewing them together to form 9 patch blocks.
- Add a white border around each block using 1 1/2″ x 9 1/2″ and 1 1/2″ x 11 1/2″ rectangles.
- Assembling the Quilt Top:
- Layout the bordered nine patch blocks, red/white strip units, black squares, and setting triangles as shown in the layout diagram.
- Sew the blocks and sashing strips into rows, and then sew the rows together, aligning and pressing seams as directed.
Adding Borders and Finishing
- Borders:
- Attach black borders first, followed by red borders, to the quilt top.
- Quilting and Binding:
- Baste, quilt, and bind your quilt. For this quilt, custom quilting designs like double swayed arches, pebbles, swirls, and paisleys add a beautiful texture.
Additional Tips
- Pressing Matters: Pressing seams towards the darker fabric helps prevent shadows from showing through the quilt top.
- Accurate Cutting: Always use a sharp rotary cutter and align your fabric carefully on the cutting mat for precise cuts.
- Chain Stitching: This technique not only saves time but also ensures consistent stitching and seam allowances.
Creating the Kings Crossing quilt is a rewarding experience, blending creativity with precision. Each step, from selecting the Pixies Dot fabrics to the final quilting stitches, brings the project to life. As you admire your finished quilt, reflect on the journey and the skills honed along the way. The Kings Crossing quilt is more than just a beautiful piece; it’s a testament to your dedication and love for the art of quilting. Enjoy the warmth and beauty of your creation, and remember, every quilt tells a story.


