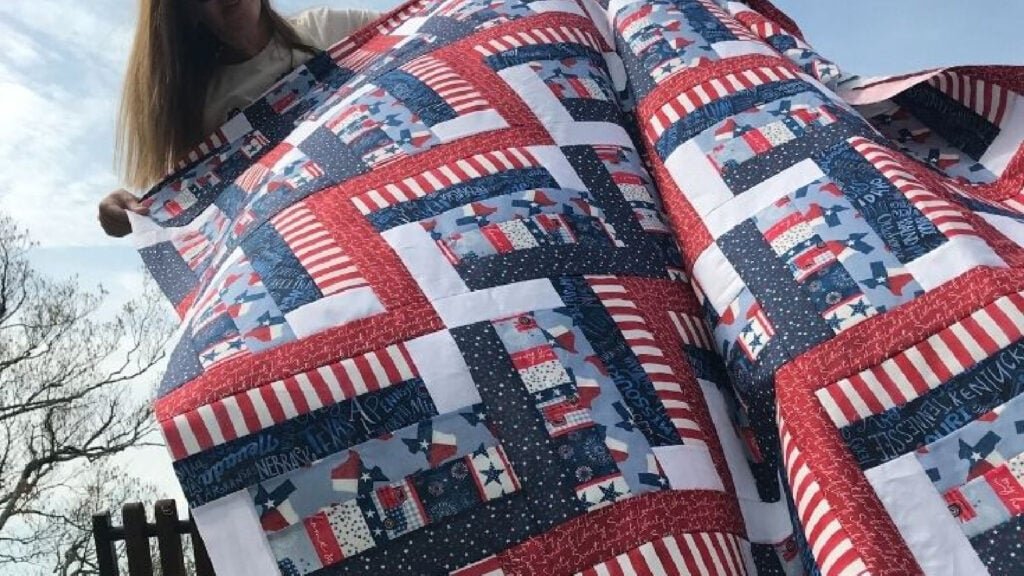
When I first encountered the “Land that I Love” fabric collection by Michael Miller Fabrics, it evoked a sense of nostalgia and pride that was impossible to ignore. This star-studded, all-American fabric collection brought back memories of family gatherings on July 4th, the smell of barbecues, and the colorful fireworks lighting up the sky. Inspired by these memories, I felt a compelling urge to create something meaningful that celebrated these values.
This is how the “Rails & Ribbons” quilt design came to life. The idea of contributing to the Quilts of Valor Foundation resonated deeply with me. As an American quilter, I’ve always wanted to honor those who serve our country. This project gave me the perfect opportunity to do so, combining my love for quilting with a heartfelt tribute to the brave men and women in the military.
Rails & Ribbons: A Patriotic Tribute in Fabric
The “Rails & Ribbons” quilt is more than just a pattern; it’s a symbol of gratitude and patriotism. Designed with simplicity and purpose, this quilt uses easy-cutting instructions and is jelly roll-friendly, making it accessible for quilters of all skill levels. The design focuses on quick assembly, allowing quilters to create a beautiful, heartfelt piece in no time.
Embracing Simplicity and Purpose
The “Rails & Ribbons” quilt stands out for its straightforward patchwork construction, allowing creators to enjoy the sewing process without the stress of complicated patterns. This simplicity not only makes the quilt-making experience enjoyable but also ensures that more quilts can be made and donated in a shorter time.
Materials
Here is a list of all the materials you’ll need to create your own “Rails & Ribbons” quilt:
- Fabric:
- Jelly rolls or full-width fabric strips in red, white, and blue.
- Assorted fabric scraps in patriotic colors (optional).
- Quilting Tools:
- Rotary cutter and mat.
- Quilting ruler.
- Sewing machine.
- Iron and ironing board.
- Thread:
- Coordinating thread colors (red, white, and blue recommended).
- Batting:
- Quality batting to fit the quilt size.
- Backing Fabric:
- A piece of fabric large enough to cover the back of your quilt.
- Quilting Pins or Clips:
- To hold your layers together during quilting.
- Quilting Needle:
- For both machine and hand quilting.

Full Pattern: Click Here
Getting Started: Tips and Considerations
Before diving into the project, here are a few tips to help you get started:
- Fabric Selection: Choose fabrics that reflect the patriotic theme. The “Land that I Love” collection is perfect, but feel free to use any red, white, and blue fabrics you have.
- Cutting: Use a rotary cutter and ruler to ensure precise cuts. This will make your piecing process much smoother.
- Layout: Before stitching, lay out your blocks to ensure a balanced distribution of colors and patterns.
- Sewing: Use a consistent seam allowance (typically ¼ inch) to keep your blocks uniform.
- Pressing: Press your seams carefully to avoid bulk and ensure flat blocks.
Step-by-Step Instructions
Step 1: Preparing the Fabric
- Cutting Strips: Begin by cutting your jelly roll strips or full-width fabric into the required sizes. For the “Rails & Ribbons” quilt, you’ll need strips of varying lengths and widths as specified in the pattern.
- Sorting: Group your fabric strips by color to keep your workspace organized.
Step 2: Piecing the Blocks
- Layout: Arrange your strips into the desired pattern, alternating colors to create a visually appealing design.
- Sewing Strips: Sew the strips together lengthwise, using a ¼ inch seam allowance. Press the seams open or to one side, based on your preference.
Step 3: Assembling the Quilt Top
- Joining Rows: Once your blocks are complete, lay them out according to the pattern layout. Join the blocks together to form rows.
- Connecting Rows: Sew the rows together, ensuring that your seams match up for a neat finish. Press the entire quilt top.
Step 4: Adding the Borders
- Cutting Borders: Cut your border fabric strips to the appropriate lengths.
- Attaching Borders: Sew the border strips to the quilt top, starting with the sides, then the top and bottom. Press the borders flat.
Step 5: Quilting
- Layering: Lay your backing fabric right side down, place the batting on top, and then the quilt top right side up. Smooth out any wrinkles.
- Basting: Pin or clip the layers together to prevent shifting during quilting.
- Quilting: Quilt as desired, either by hand or machine. You can choose a simple edge-to-edge design or something more intricate.
Step 6: Binding
- Preparing Binding: Cut your binding fabric into strips and sew them together to create one long strip.
- Attaching Binding: Sew the binding to the front of the quilt, then fold it over to the back and hand stitch it in place for a clean finish.
Additional Tips
- Consistent Seams: Maintaining a consistent seam allowance throughout the project is crucial for accurate piecing.
- Pressing: Take your time to press seams and blocks thoroughly. This step ensures your quilt top lies flat and looks polished.
- Quilting Patterns: For a patriotic quilt like “Rails & Ribbons,” consider using star or wave motifs to enhance the theme.
- Labeling: Don’t forget to add a label with the required information if you are donating the quilt to the Quilts of Valor Foundation.
Conclusion
Creating the “Rails & Ribbons” quilt is more than just a sewing project; it’s a heartfelt gesture of gratitude towards those who have served our country. Each stitch is a reminder of their sacrifice and dedication. As you work on this quilt, take a moment to reflect on the significance of your creation and the comfort it will bring to its recipient.


